
| File Sharing Part I: Connecting to Leopard from System 7 | |
| This
tutorial will show you how to connect to the shared folders and disks
of a computer running Mac OS X Leopard from a computer running Mac OS
7.6. This tutorial assumes you have all the latest updates for Leopard
installed, and all the latest updates for Mac OS 7.6 found in the Important Updates
page installed. This tutorial also assumes you've already connected
both computers to your home or office network, and have enabled TCP/IP
on both. Of course, this tutorial may or may not work for different
versions of the Mac OS. See Part II for connecting to System 7 shared volumes from Leopard. |
|
| Step One | |
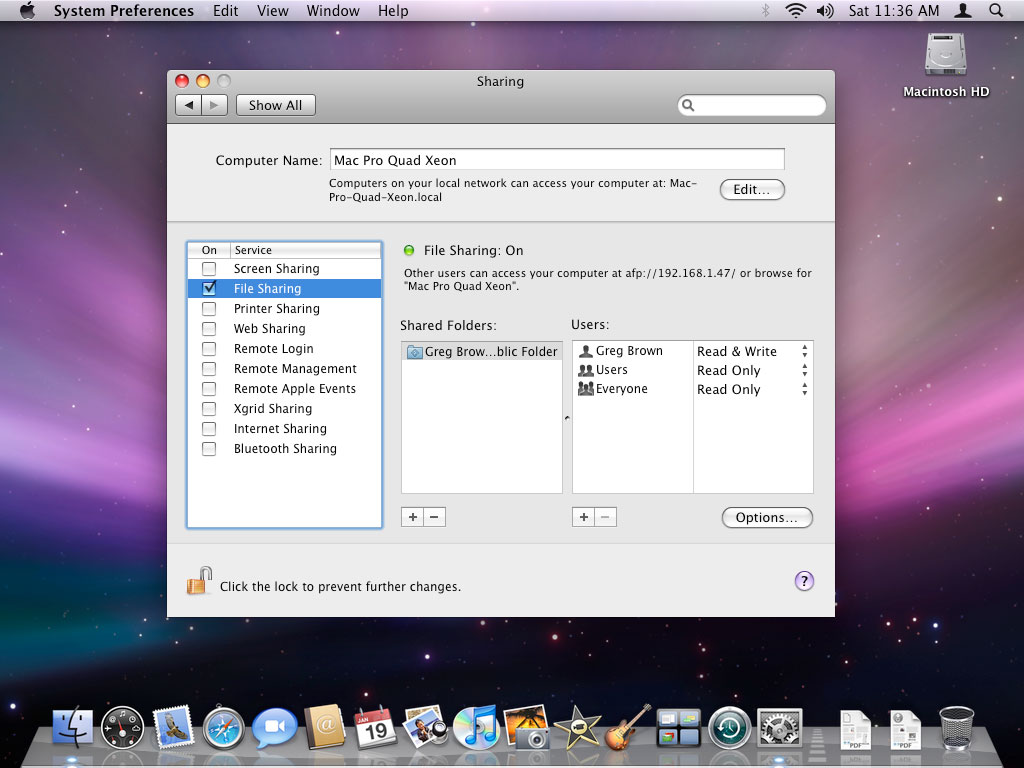 |
First, enable file sharing on
the Leopard computer by going to the Apple Menu, choosing System
Preferences, selecting Sharing in the window that appears, and enabling
File Sharing from the list on the left side of the window. Highlight File Sharing by clicking on it's name, and you'll be presented with the sharing settings for your computer. If you have administrator access, you'll be able to see the contents of Macinotsh HD, as well as your home folder, when you log in with this account from Mac OS 7.6. However, if you'd also like specific folders to be shared, or other non-administrative users to have access to certain folders, you'll have to configure Sharing settings as such. In this example, the folder "Greg Brown's Shared Folder" will be shared in addition to Macintosh HD and Greg Brown's home folder. Be sure to note the IP address (afp:// address), and move on to the next step. |
| Step Two | |
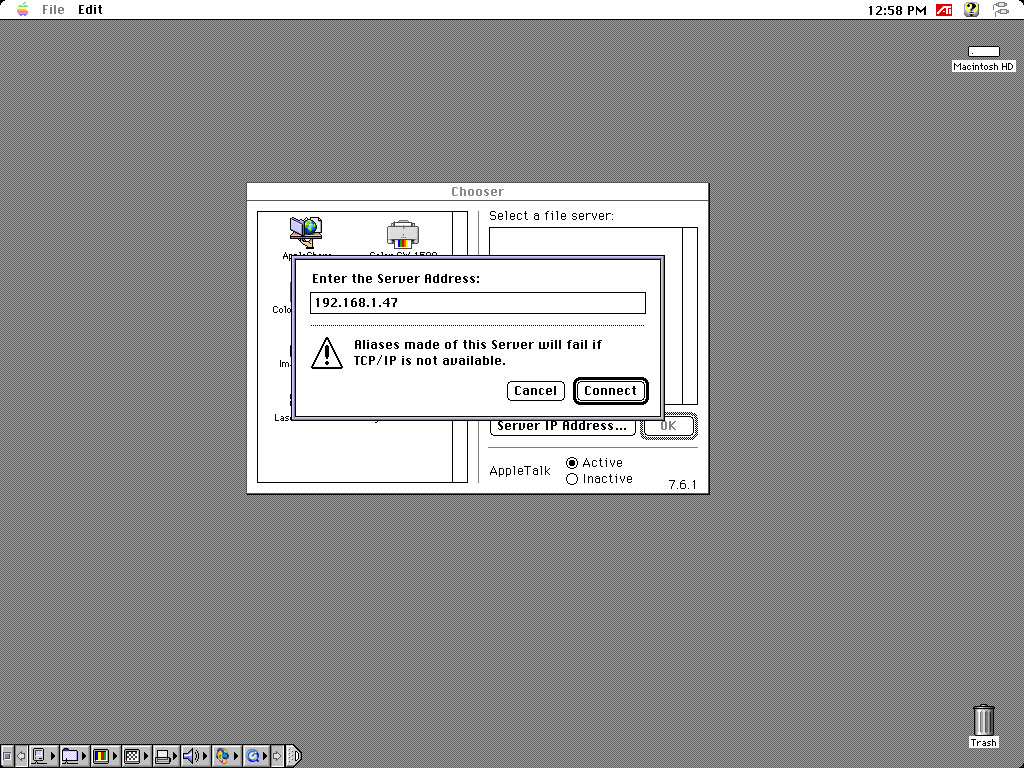 |
On
the computer running Mac OS 7.6, select the Chooser from the Apple
Menu, select Apple Share, and click on the Server IP Address button. If
you do not see a Server IP Address button, then you haven't installed
all the updates on the Important Updates page. In the box that appears, type in the IP address of your Leopard computer, which you noted in the previous step, and click Connect. If the connection fails at this point, verify your TCP/IP settings. Otherwise, move on to the next step. |
| Step Three | |
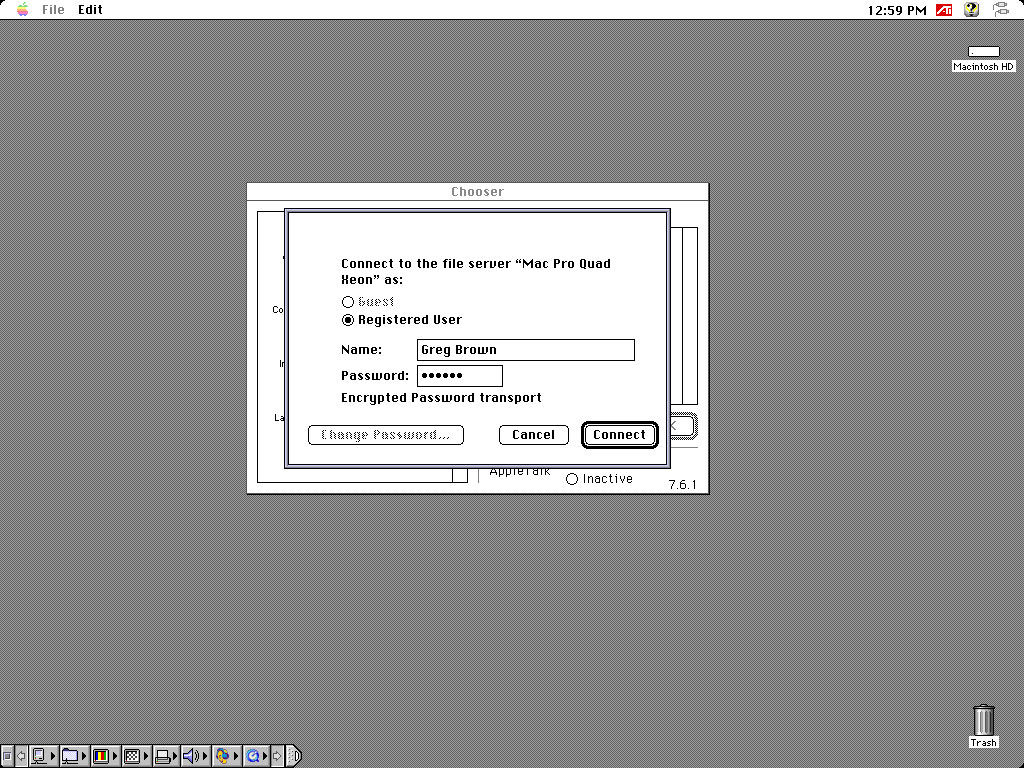 |
When you successfully connect to your Leopard system,
you may be asked to choose from a list of connection types, Apple
Standard and Encrypted Password. If so, choose Encrypted Password. Your computer will ask you to enter a username and password. Enter the same username and password for your user account on your Leopard computer, and click connect. |
| Step Four | |
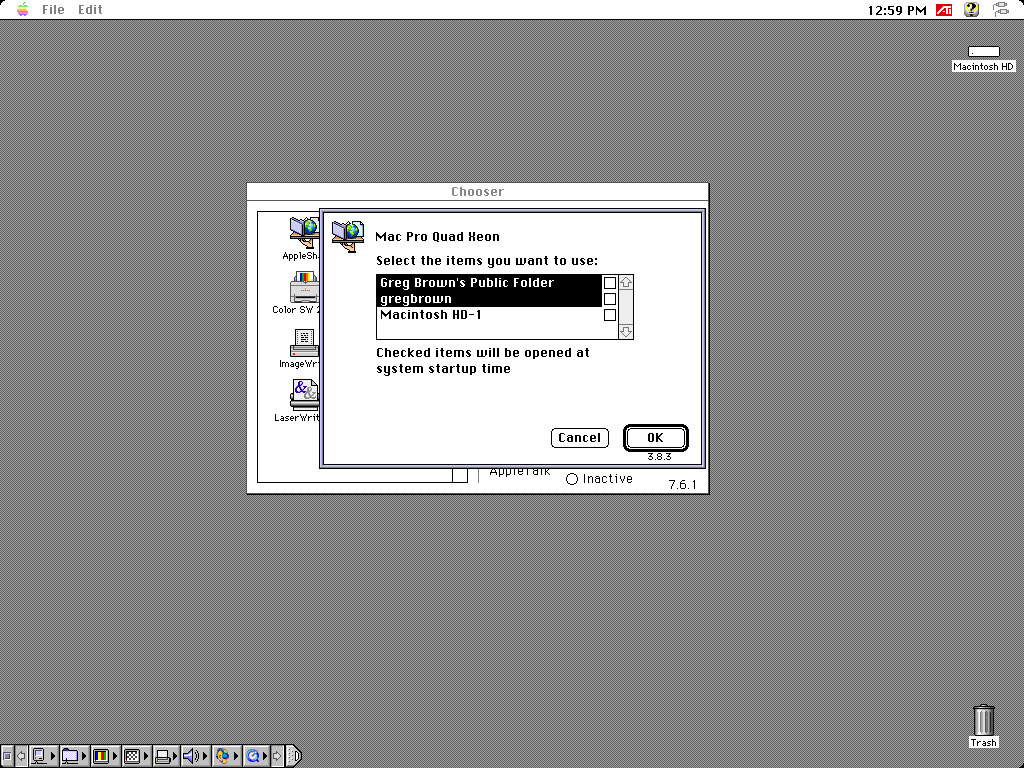 |
Now
you'll see a list of available volumes or folders you can connect to.
You can select one or more by holding down shift and click on their
names. You can also specify whether or not you want your computer to
automatically mount these volumes or folders the next time you restart. Notice that we see three options in our example. Greg Brown's Public Folder is the shared folder we had enabled in Mac OS X Sharing preferences. gregbrown is the home folder for the Greg Brown account on that computer. Finally, because Greg Brown is an adminstrator account, we also have access to Macintosh HD. Select the volumes or folders you'd like to mount, and click OK. |
| Finished! | |
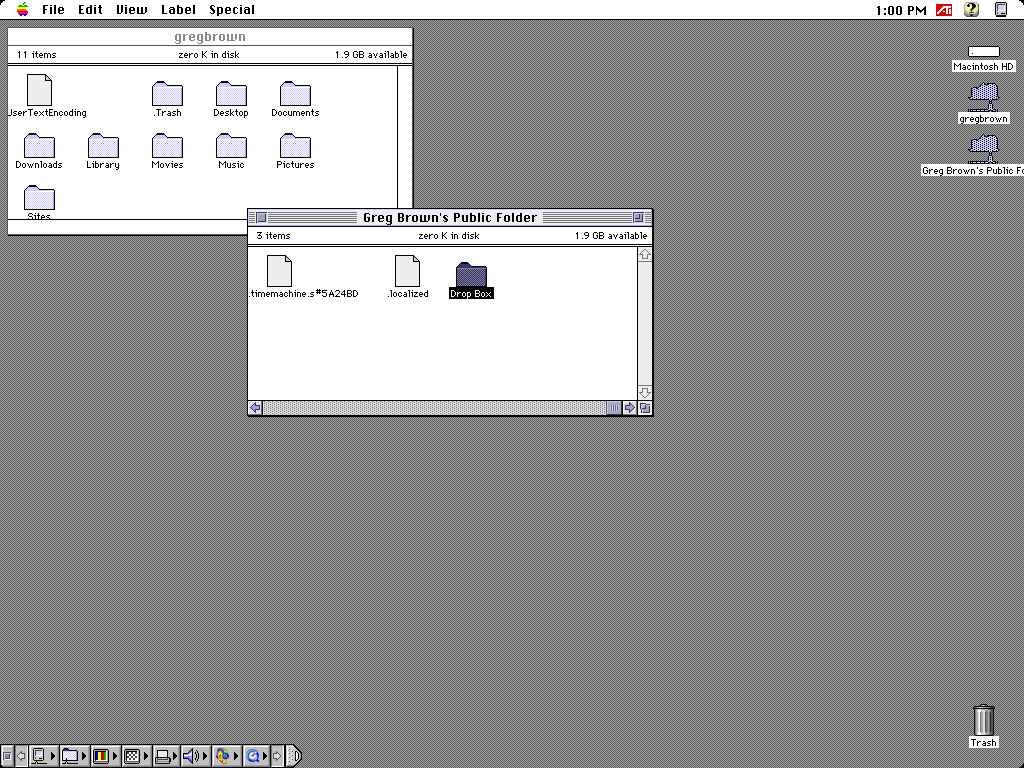 |
Congratulations!
If you followed these steps exactly, you should now be able to access
the contents of your Leopard computer from the Mac OS 7.6 finder. You
can drag files and folders to and from the Leopard disks just as you
would any file or folder on your local computer. To speed up the process of mounting your drive in the future, you can create an Alias to it by pressing Command + M, or choosing Make Alias from the File menu. Fancy! Comments | Return to Leopard Tutorials |
![]()
![]()
![]()
© 2010 System7Today.com.
The Apple Logo, Macintosh™, Mac OS™, and others property of Apple Computer, Inc.
This site is in no way affiliated with Apple Computer, Inc.